Difference between revisions of "Category:EMT"
Jump to navigation
Jump to search
| Line 13: | Line 13: | ||
* Follow the instructions in the InstallShield wizard until completion | * Follow the instructions in the InstallShield wizard until completion | ||
After installation, all project database files will be stored on the hard disk under: '''/Documents/Exigo/Projects/'''. | After installation, all project database files will be stored on the hard disk under: '''/Documents/Exigo/Projects/'''. | ||
| + | |||
| + | |||
| + | ==Step 2: Exigo Management Tool Setup== | ||
| + | |||
| + | * Start the Exigo Management Tool | ||
| + | * Click '''Projects''' at the lower-left of the window. | ||
| + | |||
| + | [[File:EMT_Setup_1.png|left]] | ||
| + | <br style="clear:both;" /> | ||
| + | |||
| + | * Click '''New''' | ||
Revision as of 09:43, 23 June 2016
EMT, or Exigo Management Tool, is the tool which is used to configure Exigo. EMT runs on windows 7, 8 and 10. The Exigo Management Tool connects to the system via the IP network and can be used online or offline.
Step 1: Installing the Exigo Management Tool (EMT)
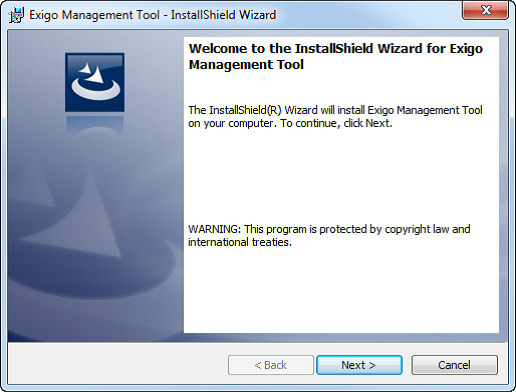
To install the Exigo Management Tool on your PC:
- Double-click the setup file for the program
- Click Next and Accept the EULA
- Follow the instructions in the InstallShield wizard until completion
After installation, all project database files will be stored on the hard disk under: /Documents/Exigo/Projects/.
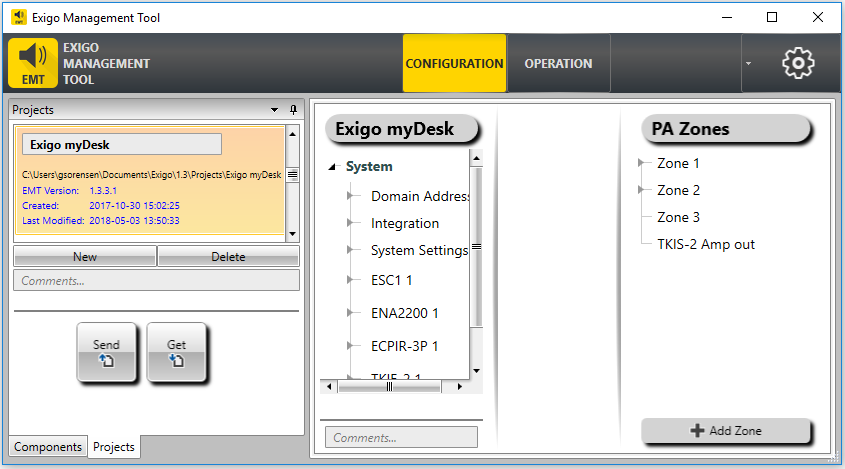
Step 2: Exigo Management Tool Setup
- Start the Exigo Management Tool
- Click Projects at the lower-left of the window.
- Click New
Pages in category "EMT"
The following 7 pages are in this category, out of 7 total.

