Difference between revisions of "EMT Getting Started"
Jump to navigation
Jump to search
(Tag: Visual edit) |
(Tag: Visual edit) |
||
| Line 5: | Line 5: | ||
Before uploading a complete new database, it is recommended to do a factory reset of the controller: | Before uploading a complete new database, it is recommended to do a factory reset of the controller: | ||
* Log on to the Primary System Controller and go to: '''System Maintenance''' > '''System Recovery''' > '''Load Factory Defaults''' | * Log on to the Primary System Controller and go to: '''System Maintenance''' > '''System Recovery''' > '''Load Factory Defaults''' | ||
| − | To create and upload a database, do the following: | + | To create and upload a database in EMT, do the following: |
# Create a New Database | # Create a New Database | ||
# Add Amplifiers | # Add Amplifiers | ||
| Line 16: | Line 16: | ||
== Step 1. Create a New Database == | == Step 1. Create a New Database == | ||
| − | In the navigation pane | + | In the navigation pane: |
| + | * Select '''Projects''' | ||
| + | |||
* Click '''New''' and follow the instructions in the wizard | * Click '''New''' and follow the instructions in the wizard | ||
[[File:EMT getting started 2.JPG|thumb|left|150px|EMT - New Database wizard]] | [[File:EMT getting started 2.JPG|thumb|left|150px|EMT - New Database wizard]] | ||
| Line 23: | Line 25: | ||
== Step 2. Add Amplifiers == | == Step 2. Add Amplifiers == | ||
| − | * | + | * Select '''Components''' |
| + | * Click '''Devices''' to open options<br> | ||
[[File:EMT getting started 3.JPG|thumb|left|300px|EMT - Adding Amplifier]] | [[File:EMT getting started 3.JPG|thumb|left|300px|EMT - Adding Amplifier]] | ||
<br style="clear:both;" /> | <br style="clear:both;" /> | ||
| − | * Drag the Amplifier into '''System''' | + | * Drag the desired Amplifier into '''System''' |
== Step 3. Define Zones == | == Step 3. Define Zones == | ||
Revision as of 12:03, 9 March 2017
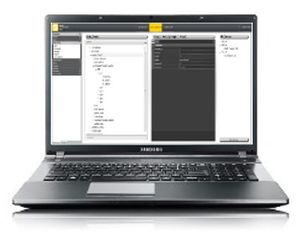
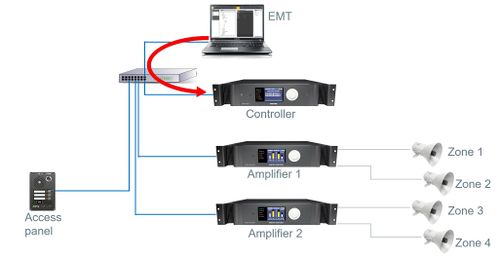
This article describes how to use EMT to create and upload a new database.
Before uploading a complete new database, it is recommended to do a factory reset of the controller:
- Log on to the Primary System Controller and go to: System Maintenance > System Recovery > Load Factory Defaults
To create and upload a database in EMT, do the following:
- Create a New Database
- Add Amplifiers
- Define Zones
- Add Access Panels
- Upload Database
Contents
Step 1. Create a New Database
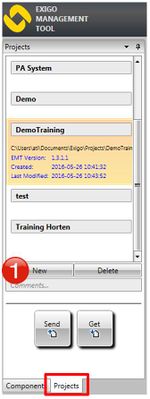
In the navigation pane:
- Select Projects
- Click New and follow the instructions in the wizard
All of the parameters in the wizard may be changed at a later stage.
Step 2. Add Amplifiers
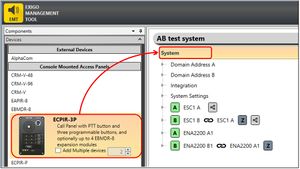
- Select Components
- Click Devices to open options
File:EMT getting started 3.JPG
EMT - Adding Amplifier
- Drag the desired Amplifier into System
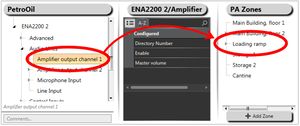
Step 3. Define Zones
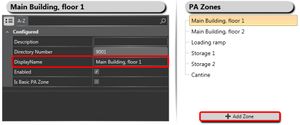
To add zones in the system:
- Click the + Add Zone button
It is recommended to give the zones a logical name.
To add amplifier outputs to the zone:
- Either drag the whole Amplifier or the Amplifier output channel to the zone
Step 4. Add Access Panels
- In Components view open Devices view
- Drag the desired Access Panel into System
To add functions to the access panel (for example Live Speech) see Live Speech.
Step 5. Upload Database
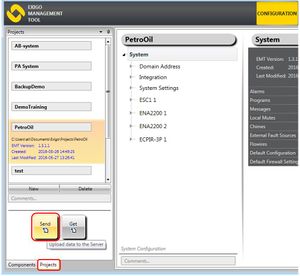
- In the Navigation pane, select Projects view
- Click Send to upload the new configuration database to the Exigo system
