Difference between revisions of "Analog Integration"
(→Configuration) |
|||
| Line 21: | Line 21: | ||
Configure a line output to a dedicated zone.<br> | Configure a line output to a dedicated zone.<br> | ||
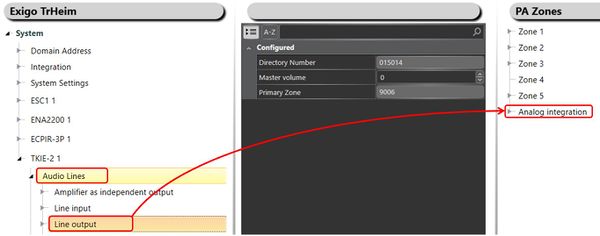
In the device three select the desired device (ESC1 or Kit) -> '''Audio Lines''' -> '''Line Output''': | In the device three select the desired device (ESC1 or Kit) -> '''Audio Lines''' -> '''Line Output''': | ||
| − | [[File:Analog integration 4.JPG|thumb|left| | + | [[File:Analog integration 4.JPG|thumb|left|600px|Assigning a line output to a dedicated zone]] |
<br style="clear:both;" /> | <br style="clear:both;" /> | ||
Drag the '''Line Output''' to the dedicated output. | Drag the '''Line Output''' to the dedicated output. | ||
Revision as of 14:52, 6 December 2016
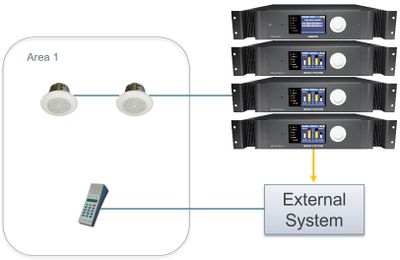
This article explains how to us an analog audio output from Exigo to integrate with 3rd party equipment.
There is two options for analog audio outputs in Exigo:
- Line output on ESC1 controller(s)
- Line output on kits (TKIS-2 or TKIE-1/TKIE-2)
Best practice for line outputs is to use a dedicated zone.
It can be part of another zone, but it is easier to control as a unique zone.
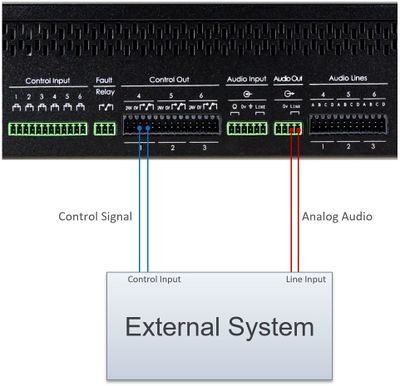
Signaling to the external system can be done with control output(s).
ESC1 line output
Using line outputs on ESC1 will be convenient if the external system is located close to the system controller(s).
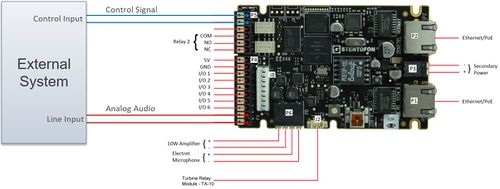
Kit line output
Kits can be connected over network and the kit itself can therefore be located closer to the external system.
Configuration
Configure a line output to a dedicated zone.
In the device three select the desired device (ESC1 or Kit) -> Audio Lines -> Line Output:
Drag the Line Output to the dedicated output.


