Difference between revisions of "EMT Getting Started"
Jump to navigation
Jump to search
(→Step 4. Add Access Panels) |
(→Step 4. Add Access Panels) |
||
| Line 42: | Line 42: | ||
Drag the desired '''Access Panel''' into '''System'''.<br> | Drag the desired '''Access Panel''' into '''System'''.<br> | ||
| − | To add functions to the access panel (for example '''Live Speech''') see [Live Speech|'''Live Speech]. | + | To add functions to the access panel (for example '''Live Speech''') see [[Live Speech|'''Live Speech]]. |
== Step 5. Upload database == | == Step 5. Upload database == | ||
Revision as of 15:48, 16 November 2016
This article describes how to create and upload new database.
The steps needed to create and upload a database is:
- Create a new database
- Add Amplifiers
- Defining zones
- Add Access Panels
- Upload database
Contents
Step 1. Create a new database
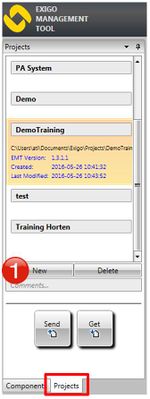
In the navigation pane, select Projects view.
Press New and follow the wizard.
All of the parameters in the wizard may be changed at a later stage.
Step 2. Add Amplifiers
In Components view open Devices view.
File:EMT getting started 3.JPG
EMT - Adding Amplifier
Drag the Amplifier into System.
Step 3. Defining zones
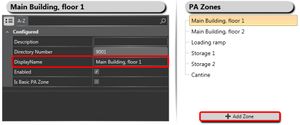
To add zones in the system press the + Add Zone button.
It is recommended to give the zones a logical name.
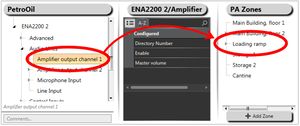
To add amplifier outputs to the zone you can either drag the hole Amplifier or the Amplifier output channel to the zone.
Step 4. Add Access Panels
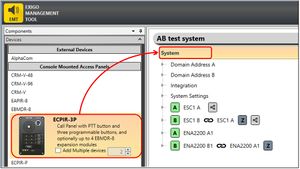
In Components view open Devices view.
Drag the desired Access Panel into System.
To add functions to the access panel (for example Live Speech) see Live Speech.
