Difference between revisions of "Generate wav files"
Jump to navigation
Jump to search
(Tag: Visual edit) |
|||
| Line 14: | Line 14: | ||
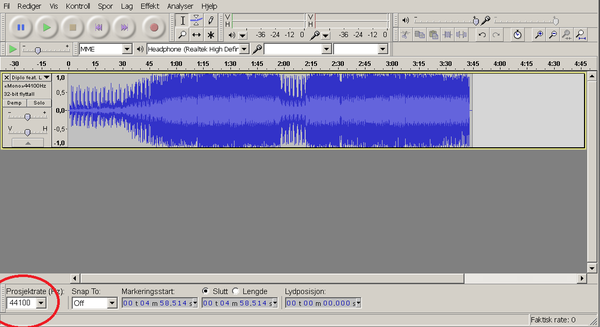
[[File:audacity_prosjektrate.png|600px]] | [[File:audacity_prosjektrate.png|600px]] | ||
| + | |||
4. OPTIONAL: | 4. OPTIONAL: | ||
| Line 20: | Line 21: | ||
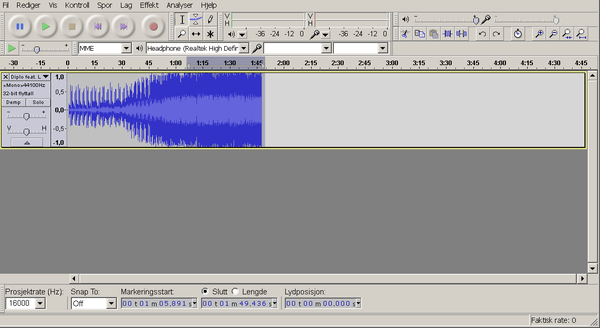
[[File:audacity_before_fade.png|600px]] | [[File:audacity_before_fade.png|600px]] | ||
| + | |||
| Line 25: | Line 27: | ||
less abrubt ending of the audio. This function will reduce the audio in | less abrubt ending of the audio. This function will reduce the audio in | ||
the selected area | the selected area | ||
| + | |||
| + | |||
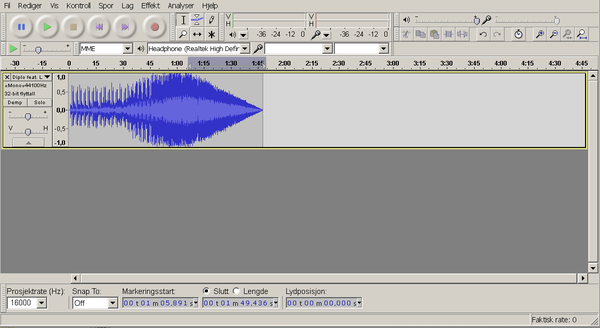
| + | [[File:audacity_after_fade.png|600px]] | ||
| + | |||
| + | 5. Export audio as wav file by going to "File->Export Audio" and selecting "Save as type = WAV (Microsoft) signed 16 bit PCM" | ||
Revision as of 14:49, 29 January 2016
How to generate Wav files for AMC-IP
This guide can be used to adjust any audio files to be compatibile with AMC-IP
Step-by-step guide, Norwegian version of Audacity
1. Open the audio file in Audacity
2. Change to mono file by going to "Spor -> Stereospor til Mono"
3. Change "Prosjektrate (Hz)" to 16000
4. OPTIONAL:
a. Reduce length of file by selecting audio and pressing delete
b. Select an area and press "Effekt -> Ton Ut" to make a less abrubt ending of the audio. This function will reduce the audio in the selected area
5. Export audio as wav file by going to "File->Export Audio" and selecting "Save as type = WAV (Microsoft) signed 16 bit PCM"


