Difference between revisions of "Configure ENSER-8"
(→Step 8) |
(→Step 8) |
||
| Line 51: | Line 51: | ||
Configure the interface by entering the switch IP address and subnet mask and pressing '''Return'''.<br> | Configure the interface by entering the switch IP address and subnet mask and pressing '''Return'''.<br> | ||
The IP address and subnet masks shown below are examples:<br> | The IP address and subnet masks shown below are examples:<br> | ||
| − | <code>Configuring interface vlan1:< | + | <code>Configuring interface vlan1:</code> |
| − | Configure IP on this interface? [yes]: '''yes''' | + | <code>Configure IP on this interface? [yes]: '''yes'''</code> |
| − | IP address for this interface: '''10.4.120.106''' | + | <code>IP address for this interface: '''10.4.120.106'''</code> |
| − | Subnet mask for this interface [255.0.0.0]: '''255.0.0.0'''</code> | + | <code>Subnet mask for this interface [255.0.0.0]: '''255.0.0.0'''</code> |
== Understanding Command Modes == | == Understanding Command Modes == | ||
Revision as of 11:00, 23 December 2016
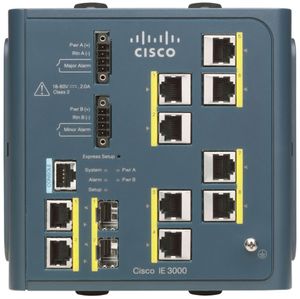
This article explains the basics on how to configure the ENSER-8 (Cisco IE-3000-8TC).
Contents
Connect to the switch
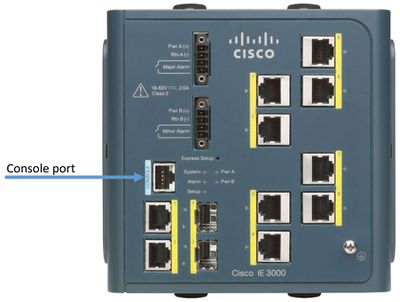
To configure the switch use the cable that came with the switch and connect to the console port.
Use a terminal that supports serial, for example PuTTY
- Baud rate default is 9600
- Data bits default is 8
- Stop bits default is 1
- Parity settings default is none
Initial Configuration Information
To set up the switch, you need to complete the setup program, which runs automatically after the switch is powered on.
Setup Program
Step 1
Enter yes at these two prompts:
Would you like to enter the initial configuration dialog? [yes/no]: yes
Would you like to enter basic management setup? [yes/no]: yes
Step 2
Enter a hostname for the switch, and press Return:
Enter host name [Switch]: host_name
Step 3
Enter an enable secret password, and press Return:
Enter enable secret: secret_password
Step 4
Enter an enable password, and press Return:
Enter enable password: enable_password
Step 5
Step 5 Enter a virtual terminal (Telnet) password, and press Return:
Enter virtual terminal password: terminal-password
Step 6
(Optional) Configure Simple Network Management Protocol (SNMP) by responding to the prompts.
To configure SNMP later, enter no:
Configure SNMP Network Management? [no]: no
Step 7
Enter the interface name (physical interface or VLAN name) of the interface that connects to the management network, and press Return.
For this release, always use vlan1 as that interface:
Enter interface name used to connect to the management network from the above interface summary: vlan1
Step 8
Configure the interface by entering the switch IP address and subnet mask and pressing Return.
The IP address and subnet masks shown below are examples:
Configuring interface vlan1:
Configure IP on this interface? [yes]: yes
IP address for this interface: 10.4.120.106
Subnet mask for this interface [255.0.0.0]: 255.0.0.0
Understanding Command Modes
The Cisco user interface is divided into many different modes.
The commands available depend on which mode you are currently in.
Entering a question mark (?) will give you a list of commands available for each mode.
The four most used modes are:
- User EXEC
- Privileged EXEC
- Global configuration
- Interface configuration
Additional documentation
For more documentation, please visit the Zenitel web page: https://www.zenitel.com/product/enser-8
Cisco Industrial Ethernet 3000 Switches
Cisco IE-3000-8TC Software Configuration Guide

