Difference between revisions of "Setting up a small A-B system"
(→Step 8: Exigo Management Tool System Configuration) |
(→Step 8: Exigo Management Tool System Configuration) |
||
| Line 228: | Line 228: | ||
=== Assigning the '''ENA''' Amplifiers to the System: === | === Assigning the '''ENA''' Amplifiers to the System: === | ||
| + | * Click '''Components''' at the lower-left of the window. | ||
| + | * Click '''Devices''' from the menu box | ||
| + | * Under Rack Mounted Devices select'''ENA2200''' and under '''Multiple devices'' select 4 | ||
| + | * Drag-and-drop '''ENA2200''' to '''System''' | ||
Revision as of 12:16, 23 August 2016
This article will explain how to setup and configure a small Exigo A-B system.
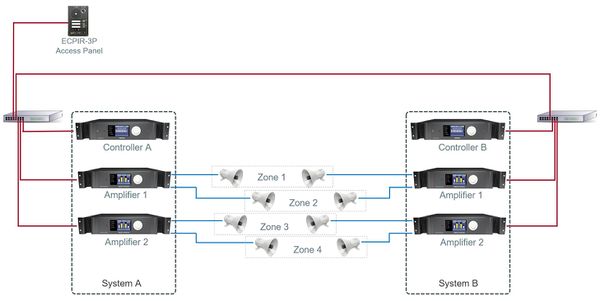
System A will have one ESC1 Controller and two ENA2200 Amplifiers.
System B will have one ESC1 Controller and two ENA2200 Amplifiers.
In addition there will be one ECPR-3P connected to the system.
The system will be programmed with 4 Zones.
With the PPT button we will configure Live Speech on all zones.
Before you start configure make sure that all devices have been updated to the latest software/firmware.
Contents
- 1 Step 1: IP address
- 2 Step 2: Primary System Controller Setup
- 3 Step 3: Secondary System Controller Setup
- 4 Step 4: ENA Amplifier Setup
- 5 Step 5: ECPIR-3P Setup
- 6 Step 6: Install Exigo Management Tool (EMT)
- 7 Step 7: Exigo Management Tool Setup
- 8 Step 8: Exigo Management Tool System Configuration
- 9 Step 9: Upload database
Step 1: IP address
Each device will need to be configured with an IP address and subnet which is in range of the AMC-IP card.
Table below lists IP range for a small system with one amplifier and on access panel. All subnets are set to 255.255.255.0
| Device | IP | Directory number |
|---|---|---|
| PSC System A | 10.5.11.11 | |
| ESC-1 System A | 10.5.11.101 | 013010 |
| ENA 1 System A | 10.5.11.110 | 012010 |
| ENA 2 System A | 10.5.11.111 | 012020 |
| PSC System B | 10.5.11.12 | |
| ESC-1 System B | 10.5.11.102 | 023010 |
| ENA 1 System B | 10.5.11.120 | 022010 |
| ENA 2 System B | 10.5.11.121 | 022020 |
| ECPIR-3P | 10.5.11.200 | 011010 |
Step 2: Primary System Controller Setup
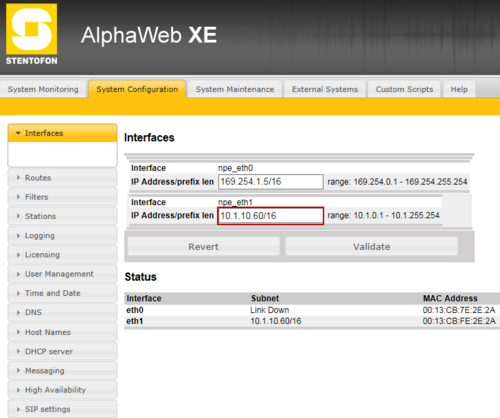
Open up the front of the ESC1 System Controller. Connect your computer to eth0.
- Open a web browser and enter the default IP address of port npe_eth0: 169.254.1.5
- Log in with username: admin and password: alphaadmin
- Select System Configuration > Interfaces
- Enter the appropriate IP address (10.5.11.11 for Controller A and 10.5.11.12 for Controller B) in the npe_eth1 field.
This must be done for the ESC System controller for both System A and B.
Step 3: Secondary System Controller Setup
Connect your computer to eth1 (on the back of the ESC1 System Controller).
To find the IP address of the Secondary System Controller:
- Turn the menu selection knob on the system controller to select Settings > Network to see the IP address on the display.
To configure the IP address and directory number:
- Open a web browser and enter IP address: 169.254.x.x
- Log in with username: admin and password: alphaadmin
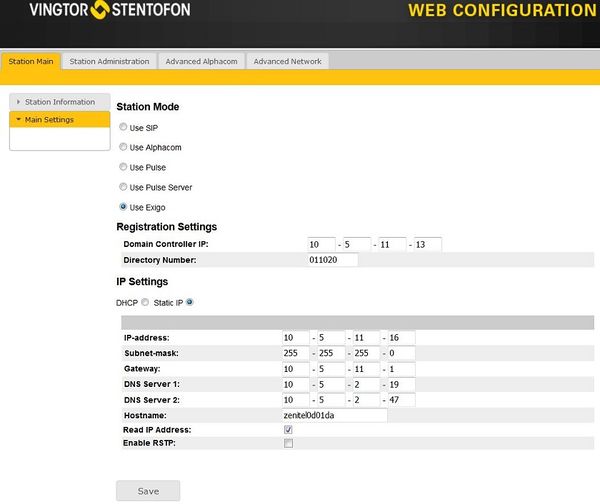
- Select Station Main > Main Settings
Set the following values:
- Station Mode: Use Exigo
- Registration Settings:
- Primary System Controller address: 10.5.11.11 for Controller A and 10.5.11.12 for Controller B (IP address previously set for PSC)
- Directory Number: 013010 for Controller A and 023010 for Controller B (corresponds to the Directory Number automatically assigned to the system controller in the Exigo Management Tool)
- IP Settings: Static IP
- IP-address: 10.5.11.101 for Controller A and 10.5.11.102 for Controller B
- Subnet-mask: 255.255.255.0
- Gateway: 10.5.11.1
Step 4: ENA Amplifier Setup
Connect your computer to eth1 (on the back of the ENA Amplifier).
To find the IP address of the ENA Amplifier:
- Turn the menu selection knob on the Amplifier to select Settings > Network to see the IP address on the display.
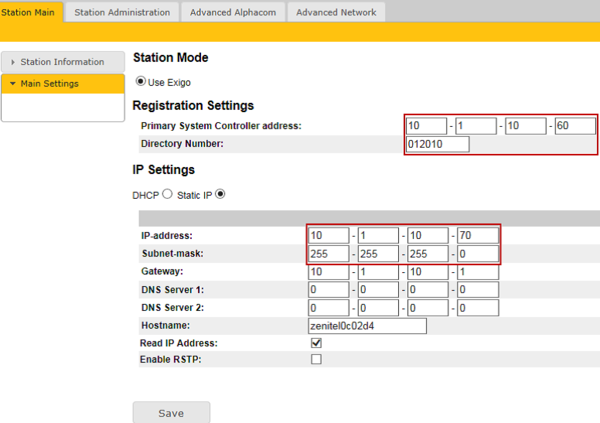
To configure the IP address and directory number:
- Open a web browser and enter IP address: 169.254.x.x
- Log in with username: admin and password: alphaadmin
- Select Station Main > Main Settings
Set the following values:
- Station Mode: Use Exigo
- Registration Settings:
- Primary System Controller address: 10.5.11.11 for Controller A and 10.5.11.12 for Controller B (IP address previously set for PSC)
- Directory Number: Set the correct Directory Number according to the list above
- IP Settings: Static IP
- IP-address: set the correct IP address according to the IP address list above
- Subnet-mask: 255.255.255.0
- Gateway: 10.5.11.1
Step 5: ECPIR-3P Setup
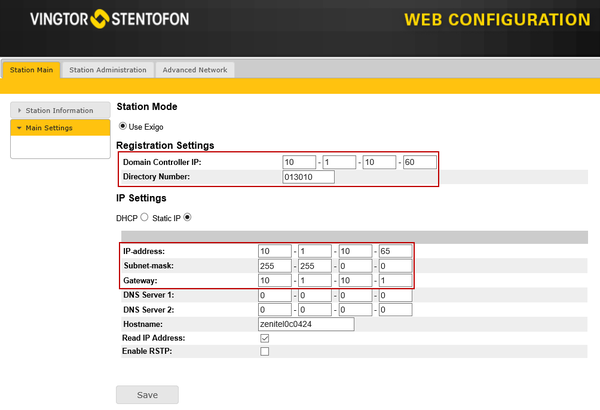
Configuration is done via the access panel’s web interface. After making sure that the access panel is connected to the same LAN and logical subnet as your PC, follow the procedure described below.
To configure the IP address and directory number:
- Open a web browser and enter IP address: 169.254.x.x
- Log in with username: admin and password: alphaadmin
- Select Station Main > Main Settings
Set the following values:
- Station Mode: Use Exigo
- Registration Settings:
- Primary System Controller address: 10.5.11.11 (IP address previously set for PSC)
- Directory Number: 011010 (corresponds to the Directory Number automatically assigned to the system controller in the Exigo Management Tool)
- IP Settings: Static IP
- IP-address: 10.5.11.200
- Subnet-mask: 255.255.255.0
- Gateway: 10.5.11.1
Step 6: Install Exigo Management Tool (EMT)
Install EMT on your computer. See this page for details: Installing EMT
Step 7: Exigo Management Tool Setup
- Start the Exigo Management Tool
- Click Projects at the lower-left of the window.
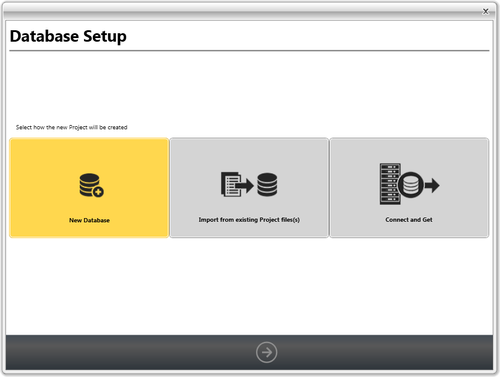
- Click New
- Click the New Database tab
- Click the right-arrow icon at the bottom of the window
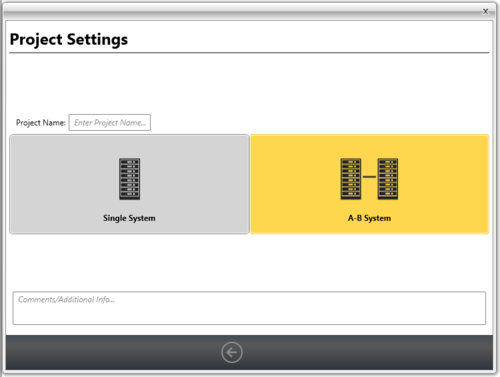
- Enter a project name in the Project field
- Select the A-B System tab
- Click the right-arrow icon at the bottom of the window
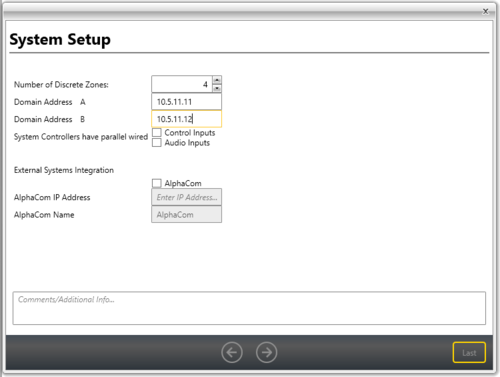
- Set 4 for the Number of Discrete Zones
- Enter IP address 10.5.11.11 in Domain Address A
- Enter IP address 10.5.11.12 in Domain Address B
- Click the right-arrow icon at the bottom of the window
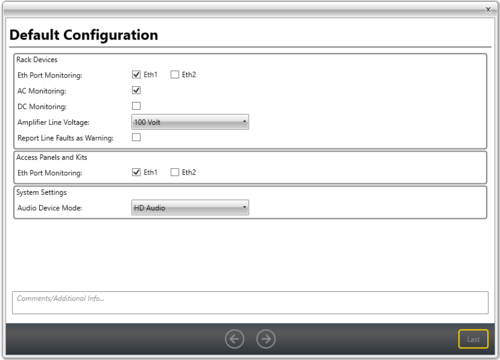
Select the desired monitoring:
- Select Eth1 for the Rack Devices
- Select AC Monitoring
- Select Eth1 for the Access Panels and Kits
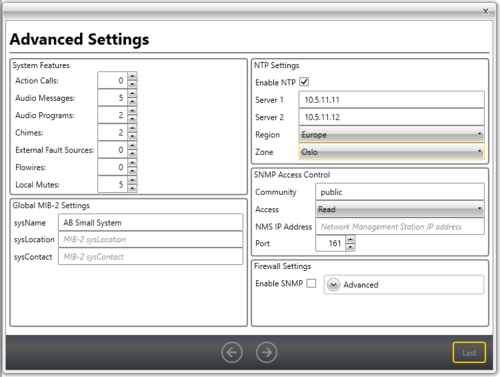
Select the desired Advanced Settings:
- Default setting is OK. This can be changed later if needed.
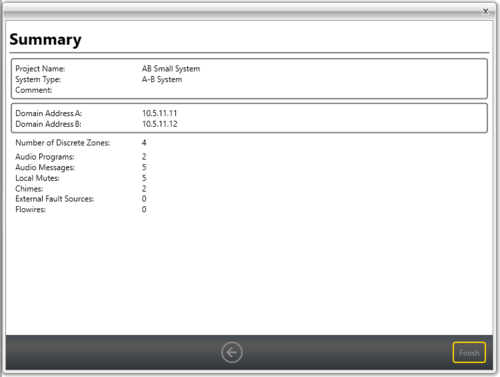
- Click the right-arrow icon at the bottom of the window to display a project summary
- Click Finish to complete the setup of the project
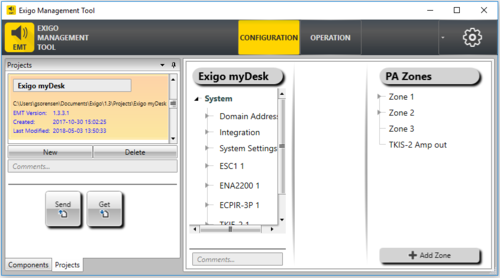
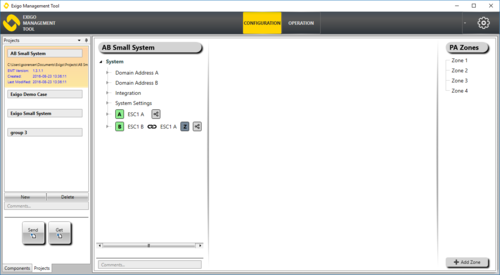
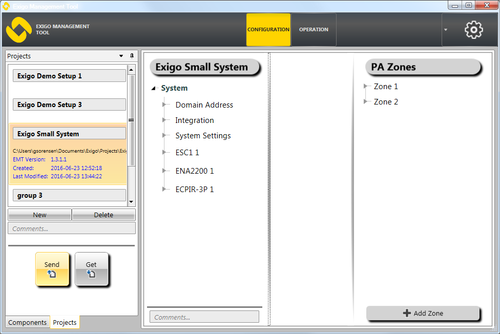
After setup, your Exigo system should look something like the following:
Step 8: Exigo Management Tool System Configuration
When the Project is created in EMT it is time to do configuration on the System.
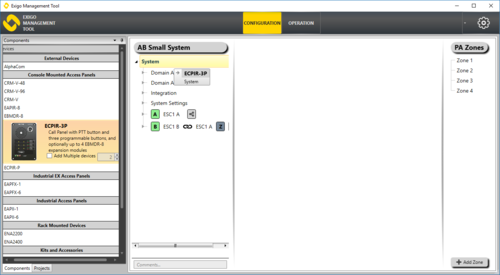
Assigning the ECPIR-3P Access Panel to the System:
- Click Components at the lower-left of the window.
- Click Devices from the menu box
- Under Console Mounted Access Panels drag-and-drop ECPIR-3P to System
Select One device registered in controller A:
Click Done.
The access panel will now appear as ECPIR-3P 1 in the device list under System.
Assigning the ENA Amplifiers to the System:
- Click Components at the lower-left of the window.
- Click Devices from the menu box
- Under Rack Mounted Devices select'ENA2200 and under Multiple devices select 4
- Drag-and-drop ENA2200 to System
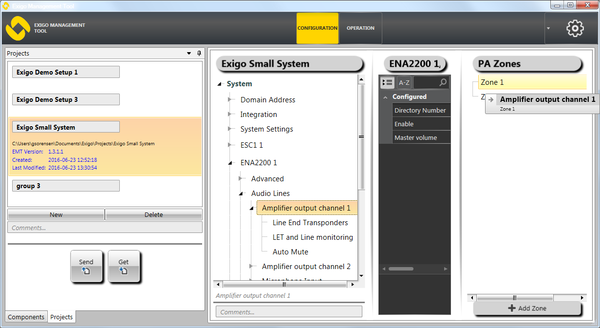
Assigning Channels on Amplifier to Zones:
- Select ENA2200 A1 > Audio Lines > Line > Amplifier output channel 1
- Drag-and-drop Amplifier output channel 1 to Zone 1 under PA Zones
- Repeat the procedure to assign channel 2 on the amplifiers to Zone 2.
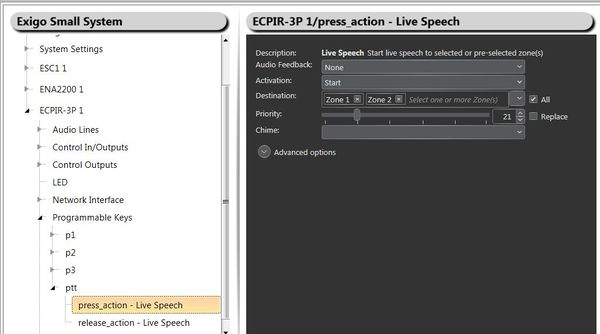
Assigning Zone to the PPT Button
- Select System > ECPIR-3P 1 > Programmable Keys > ptt > press_actions
- In the detailed view select All under Destination
Do the same for release_action:
- Select System > ECPIR-3P 1 > Programmable Keys > ptt > press_release
- In the detailed view select All under Destination
Step 9: Upload database
In the Navigation pane, select Projects view.
- Press Send to upload the new configuration to the Exigo system
The system shall now be working. If you push PTT it shall be possible to make a live speech to both zone.
