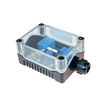
ENA2200

Exigo Network Amplifier
- 2x 200 watt continuous GA effect
- 2x 200 watt PA effect
- Power efficient class D technology
- 115/230 VAC primary power and 24-48 VDC secondary power
- Redundant Ethernet connections
- Digital audio processing, equalizer and audio delay
- Loudspeaker line monitoring
- Input for backup amplifier
The Exigo Network Amplifier is designed for use in marine and offshore environments. The construction is extremely robust and can handle mobile environments as well as stationary, temperature controlled rooms. The amplifier utilizes state-of-the-art class D amplifier technology for superb audio quality and high power efficiency.
The amplifier connects to audio sources through standard 100 Mbps Ethernet. There are two Ethernet connections, making redundant cabling between amplifier and network possible. The amplifier has DSP capabilities, enabling it to do audio equalization and audio delay. The DSP is also an integral part of audio synchronization between all audio outputs in the system and alarm tone generation.
The amplifier operates from a primary 115/230 VAC supply and have automatic uninterrupted switch-over to a secondary 24-48 VDC supply if the primary should fail. The amplifier will continue to operate with full service during and after the switch-over.
Each audio channel features separate line level inputs, allowing backup amplifiers to take over operation of the speaker loops in the event of critical faults.
The amplifier monitors the speaker lines for shorts, overload and opens. A Line End Transponder (ELTSI) is required for reliable detection of an open line. More than one ELTSI can be connected to the same line, allowing monitoring of several branches on the speaker line. The amplifier also monitors control inputs, power, temperature, network connections and every other component required for operation of essential services. Faults will be reported to the system controller, but will also be indicated locally on the amplifier.
The amplifier’s control inputs/outputs and audio inputs can be used locally by the amplifier (e.g. for PTT and audio from a handheld microphone) or can be controlled by the system (e.g. audio input for background music).
Installation
Overview - Front

| 1 | Mounting Flange | The mounting flanges are used to mount the unit in 19” equipment racks |
| 2 | Ventilation Inlets | The ventilation inlets should be kept free of obstacles and dust. Fans control the airflow based on internal temperature |
| 3 | Headphone Jack | The headphone connection can be used to listen to the different audio streams in the Amplifier. |
| 4 | Status Indicators | The status indicators are used to display the status of important parameters such as power supplies and faults |
| 5 | LCD Display | The LCD screen displays status and a graphical user interface |
| 6 | Control Knob | The control knob is used to select and execute menu items in the user interface. The knob can be rotated and pressed. |
| 7 | Integrated Handle | These integrated handles make it easy to maneuver the unit, without adding to the installation depth |
| 8 | Ventilation Inlets | The ventilation inlets should be kept free of obstacles and dust. Fans control the airflow based on internal temperature |
Overview - Back

| 1 | Ethernet Ports | Redundant Ethernet connections for audio and control data |
| 2 | Serial Console | Serial port connection for debugging and factory programming |
| 3 | Control Inputs | 6 configurable control inputs. Each input is activated by closing the loop
between the two terminals |
| 4 | Fault Relay Output | A switching relay (NO, NC & COM) kept in the active position between COM and NO as long as no faults are present in the device |
| 5 | Control Outputs | Six configurable control outputs. Each is made of a switching relay (NO, NC and COM) in parallel with a 24VDC signal. The 24VDC part of the control output can source max 200mA and has overcurrent protection |
| 6 | Audio Inputs | Microphone and line-in audio inputs for microphones or external audio sources |
| 7 | Speaker Outputs | 100 and 70 volt outputs per channel. Each channel also has a low-power 8ohm output for single speakers. Each channel is equipped with inputs for connection to a hot-standby amplifier |
| 8 | Ground Connection | Ground connection for grounding of the unit. This is connected in parallel with the ground connection in the AC power inlet |
| 9 | DC Power Inlet | DC power inlet for 24 to 48 VDC |
| 10 | AC Power Switch | Power switch for AC power. This switch will not turn off the system controller if DC backup is connected |
| 11 | AC Power Inlet | AC power inlet for 110 to 230 VAC. The power inlet has a V-Lock mechanism for a secure connection |
Placement and Stacking
The amplifier is designed to deliver full power at ambient temperatures up to 55 °C. As long as the equipment rack is well ventilated, amplifiers can be stacked with no extra space between them. It is however recommended to add 1 HU between every group of 4 amplifiers.
Mounting
The amplifier’s mechanical construction is rigid enough to be mounted using only the four holes in the mounting flange to secure it to the rack. It is however considered good practice to mount support rails if the system is installed in a mobile environment.
Power Supply
The Amplifier shall be connected to the equipment rack’s primary and secondary (emergency) source of power.
 Only one power source may be connected if the power source itself is redundant
(e.g. UPS) or if the class/installation permits a single source of power
 Only one power source may be connected if the power source itself is redundant
          (e.g. UPS) or if the class/installation permits a single source of power
 Both power inputs are equipped with a lock, preventing the plug from falling out.
Make sure that the plug is properly inserted, and that the lock is engaged
 Both power inputs are equipped with a lock, preventing the plug from falling out.
          Make sure that the plug is properly inserted, and that the lock is engaged

The requirements for the power rails are listed in the Technical Specifications for the amplifier. The cables used for the power shall be dimensioned accordingly to the voltage and current consumption of the amplifier.
Grounding
It is always good practice to ground the cabinet of equipment installed in racks. This ensures safety and good EMC. If the unit is powered entirely through the DC power inlet, the ground connection is the only way to connect the Amplifier to ground. The ground connection of the Amplifier should be connected to the equipment rack’s ground strip using a ground wire of at least 0.75 mm² (AWG 19).
 If the Amplifier isn’t connected to ground, it will not be able to detect ground
          faults or short-circuits to ground
Ethernet Connections
The Amplifier shall be connected to the network using one or two Ethernet cables, depending on the system interconnection scheme.
Fault Relay
The Amplifier’s fault relay will trigger whenever a fault occurs in the amplifier. This relay is actively kept closed by the Amplifier so it will trigger even if the entire amplifier loses power. The connection to external equipment should be made according to the external equipment’s requirements. When no faults are present in the amplifier, an electrical connection is established between the COM and NO terminals of the fault relay. When a fault is detected, or the amplifier loses power, this connection is removed and a connection between COM and NC is established.
The fault relay should be routed from the Amplifier output to a terminal block in the equipment rack if required by the specific system.
 The fault relay on the system controller will trigger in parallel with that of the amplifier.
          In most cases, it is sufficient to use only the fault relay on the system controller.
Control Inputs
The Control Inputs should be routed from the Amplifier screw terminal to terminal blocks in the equipment rack.
Control Outputs
The Control Outputs on the Amplifier should be routed to terminal blocks in accordance with the specific system’s requirements. Cable diameter used is max 0,25 mm² flexible.
Audio Inputs
The two audio inputs on the Amplifier can be used for background music, external alarms or local microphone. The audio inputs should be routed to terminal blocks in the equipment rack or local audio sources.
Loudspeaker Connections
The Amplifier has three different options for loudspeaker connections: 8Ω, 70 volts and 100 volts. The 8Ω output is only intended for local monitoring of audio, and the power is therefore limited compared to the 70 and 100 volt lines.

| 1 | 70 volt connection |
| 2 | 100 volt connection |
| 3 | 8Ω connection |
The loudspeaker outputs from the amplifier should be routed to terminal blocks in the equipment rack according to system requirements.
Backup Amplifier
The ENA2200/ENA2400-DC/ENA2400-AC supports backup amplifiers, meaning that one amplifier can act as backup for up to 6 other amplifiers.
The backup amplifier will take over the output of the first faulty amplifier to maintain system integrity based on the configuration.
See this section for more details.
Dimensions

Accessories
|
| |
|---|---|---|
| ELTSI-1 | EAM-200 | EPMA400 |
Additional Documentation
For more documentation, please visit the Zenitel web page: https://www.zenitel.com/product/ena2200