ExigoNet
This article explains the principle of how the ExigoNet works.
With the use of SIP/SIP Trunk it is possible to make integration between different Exigo system.
Up to 8 Exigo systems can be connected together in ExigoNET. This allows for very large systems and systems requiring additional redundancy.
Each Exigo system is independent from the other systems, so in case it loses connection to the other systems it will still be operational.
Contents
Directory Numbers
In order to avoid conflicts regarding directory numbers each Exigo system needs to have its own range.
More information regarding Directory Numbers can be found here.
When a new database is created in Exigo Management Tool it is possible to define a new range of directory numbers.
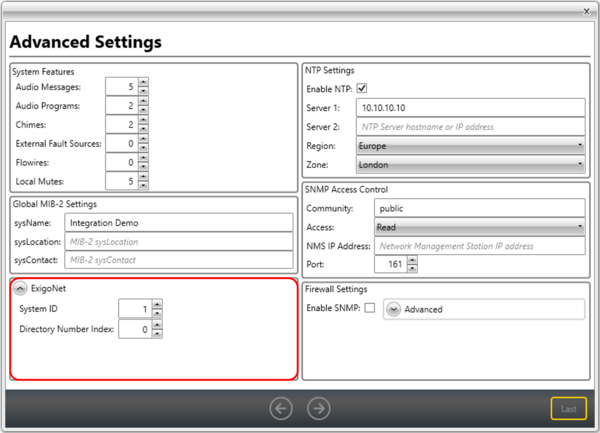
In Advanced Settings in the wizard it is possible to set the System ID and Directory Number Index.
- System ID - Changing this number will change the first two directory numbers according to the rules.
- Directory Number Index - This will set the directory number range for the Action Calls.
The default range for Action Calls is from 98001 to 98099.
If you set the Directory Number Index to 1 the default range for action Calls will be 98101 to 98199.
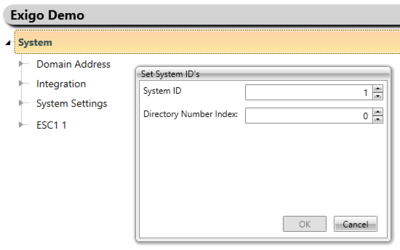
The System ID and Directory Number Index can also be changed later on.
This is done by right-clicking on System in the Device Tree and select Set System ID's.
Here it is possible to change both System ID and Directory Number Index.
Configuration
Configuration will depend on functionality needed.
Prerequisites
Two Exigo systems with different System ID and Directory Number Index.
SIP Trunk
First step is to add a SIP Trunk:
- Select Components > Devices > External Devices
- Drag-and-drop SIP Trunk on System > Integration
- Enter the IP Address of the SIP trunk (the IP address of the Primary System Controller).
SIP Trunk must be created in both Exigo systems.
SIP Device (outgoing activity)
To configure a SIP device on the system:
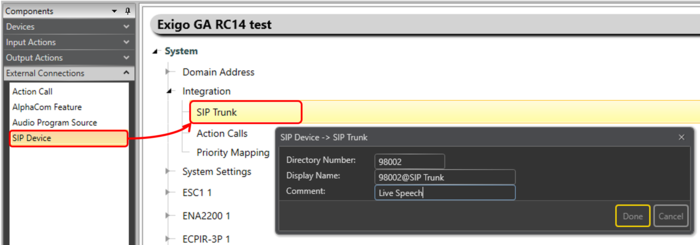
- Select Components > External Connections
- Drag-and-drop SIP Device on System > Integration > SIP Trunk
To call a SIP Device, the Sip Device has to be included in a Zone.
Best practice is to use a dedicated Zone for the SIP Device.
Action calls (incoming activity)
Exigo supports up to 99 actions calls that can be triggered by external SIP devices through the SIP trunk. These occupy the range of 98001 to 98099 (depending on the Directory Number Index) and are configured in Exigo Management Tool.
All action calls have an ON CONNECT and ON DISCONNECT action parameter.
- Drag-and-drop Action Call on System > Integration > Action Calls
- Set the number of directory numbers to add in the dialog-box
Each directory number will have On Connect and On Disconnect containers where input actions can be configured.
Redundant SIP Trunk to Exigo AB system
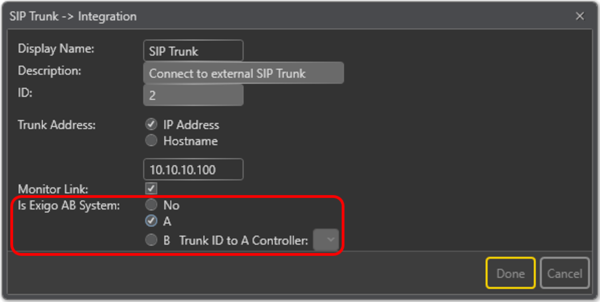
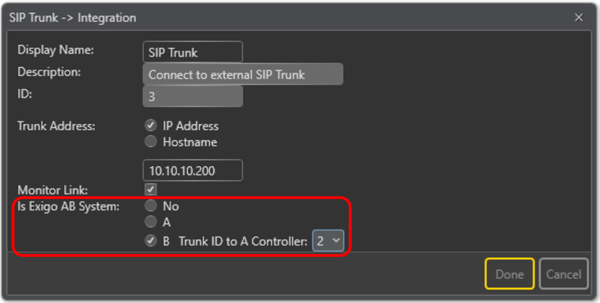
It is possible to have 2 SIP Trunks to an Exigo AB system, one to each controller.
If one of the Controllers in the AB system fails you still have a AIP Trunk to the other Controller.
- Step one - make a SIP Trunk to Controller A:
- Step two - make a SIP Trunk to Controller B:
The correct Trunk ID to Controller A must be set (in this example it is 2).
Example 1 - Live Speech
We want to configure Live Speech from one Exigo system to another (from Exigo System 1 to Exigo System 2).
Step 1
Configure SIP Trunk in both Exigo systems.
Step 2
Add a SIP Device in Exigo System 1.
This will be the Exigo system where the Live Speech is initiated.
Add the SIP Device to a Zone:
Step 3
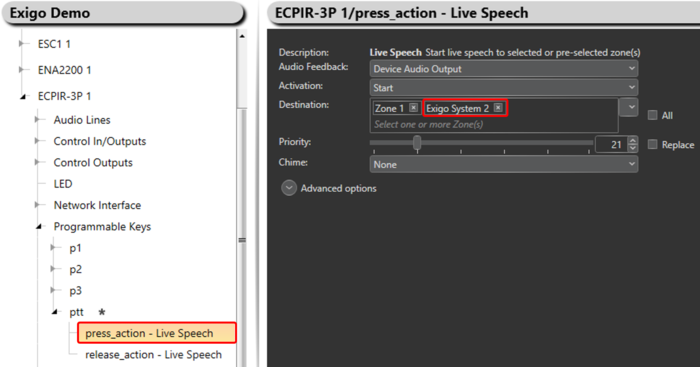
Configure a normal Live Speech in Exigo System 1 and include the Zone with the SIP Device in the Destination.
Step 4
- Add a Action Call in Exigo System 2.
- Configure a Live Speech on the Action Call:
Configure Live Speech start on_connect and stop on_disconnect.
Make sure that the SIP Device Directory Number in Exigo System 1 is the same as the Action Call in Exigo System 2.
Example 2 - Alarm
There is 2 ways of configure Alarm Control from one Exigo system to another:
- Start the Alarm in one system and transfer the audio via SIP to the other system.
- Start the Alarm in one system and trig the Alarm Generator in the other system with the use of SIP.
There are pros and cons with both ways.
In this example we will use Alarm Generator in both systems.
Step 1
Configure SIP Trunk in both Exigo systems.
Step 2
Add a SIP Device in Exigo System 1.
This will be the Exigo system where the Alarm Control is initiated.
Add the SIP Device to a Zone:
Step 3
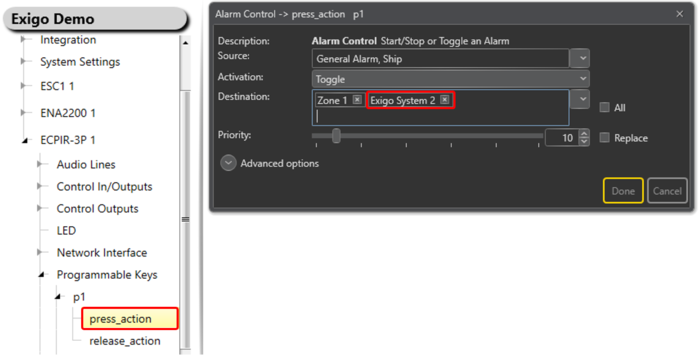
Configure a Alarm Control in Exigo System 1 and include the Zone with the SIP Device in the Destination.
Step 4
- Add a Action Call in Exigo System 2.
- Configure a Alarm Control on the Action Call:
Configure Alarm Control start on_connect and stop on_disconnect.
Make sure that the SIP Device Directory Number in Exigo System 1 is the same as the Action Call in Exigo System 2.
Availability
This function is available from Exigo 1.3.3 and newer.
